How to automate your nonprofit’s social media successfully

 PRINT
PRINTFinding time to ‘do’ social media can be a challenge, no matter the size of your nonprofit. Most of us don’t have the luxury of social media being our full time job, so how do you maintain regular activity across the channels? Social media automation has had a bad rap recently, but that’s only because we hear about it when it goes wrong. With these 5 tips, you’ll be able to schedule content in advance like the experts do.
Here’s how to schedule your social media activity the right way:
Step 1 – Decide what content can you automate
Almost anything. Really. The first point to get your head around about automating social media content is that your audience members are not all online at the same time, and certainly not at the exact time that you choose to publish a post. So in order to get more visibility and reach, you MUST re-share the same content several times over; scheduling that work in advance makes life a lot easier than remembering each time you have to do it.
Any content you have created or sourced for social media in the past can be scheduled to go back out, as long as it is not time-sensitive or related to a specific event that will pass.
Do you have blogs on your website talking about your cause or issue from 6 months ago? Yes! Those can be scheduled to go out on social media on a regular basis, as long as the information is still relevant and helpful. A video introducing people to your organization would also be a wonderful social media post to be scheduled on a regular basis. After all, what about all those new followers who joined your community after you last shared it? What about a regular ask for people to join your e-news list? That sure sounds like something that can and should be asked more than once.
The same goes for useful content others have created about your issue or cause, perhaps an infographic on poverty around the world, or a ‘how-to’ guide that could help your community.
Step 2 – Investigate the tools available
There are a multitude of tools available to help with social media scheduling and automatic posting.
Your first step should be to look at the tool you currently use, if any, and see if it has a scheduling function available. If it does, great! Start with that.
Hootsuite
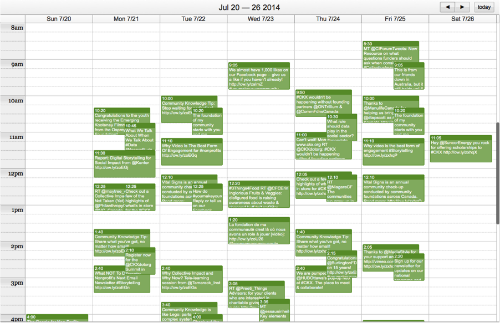
One of the most popular social media management tools for nonprofits is Hootsuite. Hootsuite’s bulk schedule tool is available only for Pro accounts, which cost $9 a month currently. The bulk schedule tool allows you to create a .csv file of updates in advance and upload them on a regular basis. Your content calendar will look a little something like this.
The scheduler does have a limitation in that you have to manually go in once uploaded and add any images one by one to your posts. One big benefit is that Hootsuite works across many platforms, so you can use it for Facebook, Twitter, LinkedIn, and Google Plus.
Hootsuite’s Pro Account also has a tool that will pick up new blogs from an RSS feed and publish them to whatever network you specify with any additional messaging you choose. This can be handy for ensuring a regular stream of updates. TIP: Ensure you only ever add trusted content sources here, as it will go out without any vetting from you.
Facebook.comallows you to schedule posts in advance very easily. You simply compose your update as normal, then choose the clock icon instead of hitting send, and select the date and time you’d like your post to go out.
Buffer
Another very popular tool is Buffer. Buffer is a great tool that can help in two main ways. First, you can write a bunch of posts at one time, and choose which social profiles to send them to. Buffer will then spread posts out throughout the day or week. Second, Buffer provides more analytics than if you just were to post to Twitter or Facebook directly.
Buffer is free for 2 profiles, but as soon as you add more (which you should) the cost is $10 a month, which also unlocks their RSS auto scheduling tool, which works in the same way as Hootsuite and keeps steady content coming through your social networks.
Rignite
One last tool worth looking at is Rignite, a little more pricey at between $19 – $39 a month, however the scheduling tools are really useful for multiple shares of content over an extended period of time. Your most popular blog post can easily be scheduled to go out once a week at various times for the next 6 months. Allowing you to concentrate on more immediate and time sensitive content. Rignite does a host of other things to make social media management easier too.
Step 3 – Pick the optimal time to schedule content
Knowing when your audience is most likely online can help ensure maximum exposure for your updates. This mega article from Buffer looks at all the conflicting reports from the web and makes some sense of it for you.
Bottom line, your audience is unique. Do your homework, and test different times to see what works for you. Looking at the analytics provided by your chosen platform will give you data on your own audience. You may be surprised how different they are from the ‘average’.
Step 4 – Measure results (and take action)
Use the analytics tools built into the tool you use to measure what is working and what is not. Facebook, Hootsuuite, Rignite, and Buffer all have reports. Only Twitter doesn’t, so if you want to measure your Twitter results, it is best to use a third party tool like the ones listed in Step 2.
Sharing old blog posts but nobody is reading them? Try scheduling at a different time of day, or on a different day to see if that increases engagement. If not, drop those posts from your schedule. Remember, your audience are telling you via their interactions what they like and what they don’t.
Nonprofit communicators have been guilty of focusing on what isn’t working and trying to make it work. Instead, drop what isn’t working, and focus on what is. Do more of that. Increase the frequency of popular updates a little and monitor the results. Giving your audience what they like and want more often is never a bad thing.
Step 5 – Have a plan in place
There are some key things to have written down and in place before going ahead and automating social media updates.
- Who is responsible for choosing and approving the content that can be scheduled?
- Who uploads and regularly checks that everything is running smoothly?
- How do you deal with emergencies, and what is defined as an emergency? Turning off all scheduled updates is a good idea when a large-scale news event happens. We all remember the stories of unfortunate social media posts going out at unfortunate times.
- How often do you review your content and change the strategy?
And that’s it. Choose your best content, content you know is useful and relevant to your audience. Choose a tool, or learn to optimize the one you have in place, use data to make decisions on when to share your content, check in at regular intervals and make changes to your plan based on results, and have a process in place for approvals and emergencies.
What are your tips for schedule social media updates? Do you have favourite tips, tools or suggestions to share?

Clare McDowall
Latest posts by Clare McDowall (see all)
- How to automate your nonprofit’s social media successfully - September 2, 2014